Ceramic Tile Installation in Standish ME

Ceramic tile installation requires precise surface preparation, accurate layout planning, and careful application techniques to ensure a durable and visually consistent finish. At Better Solution Painting, our ceramic tile installation services in Standish, ME are focused on delivering properly aligned, long-lasting tile work for floors, walls, and specialty surfaces. Each project is completed with attention to substrate conditions, moisture exposure, and the intended use of the space.
Ceramic tile is commonly used in areas that experience frequent moisture, temperature changes, or heavy foot traffic. Because of this, proper installation is essential to prevent cracking, shifting, or water intrusion over time. Our process follows a structured approach from preparation through final sealing to ensure reliable performance.
Proper surface preparation is the foundation of any successful ceramic tile installation. Without a stable and clean base, tile systems can fail prematurely.
Surface Preparation for Tile Installation
Subfloor and Wall Inspection
Before installation begins, all surfaces are inspected for stability, levelness, and structural integrity. Any damaged or uneven areas are corrected to ensure a proper foundation.
Cleaning and Debris Removal
Surfaces are thoroughly cleaned to remove dust, grease, and loose materials that could affect adhesion. A clean base ensures that tile and mortar bond effectively.
Leveling and Smoothing
Leveling compounds or corrective materials are applied where needed to create an even surface. This step is essential for preventing uneven tile placement and long-term movement.
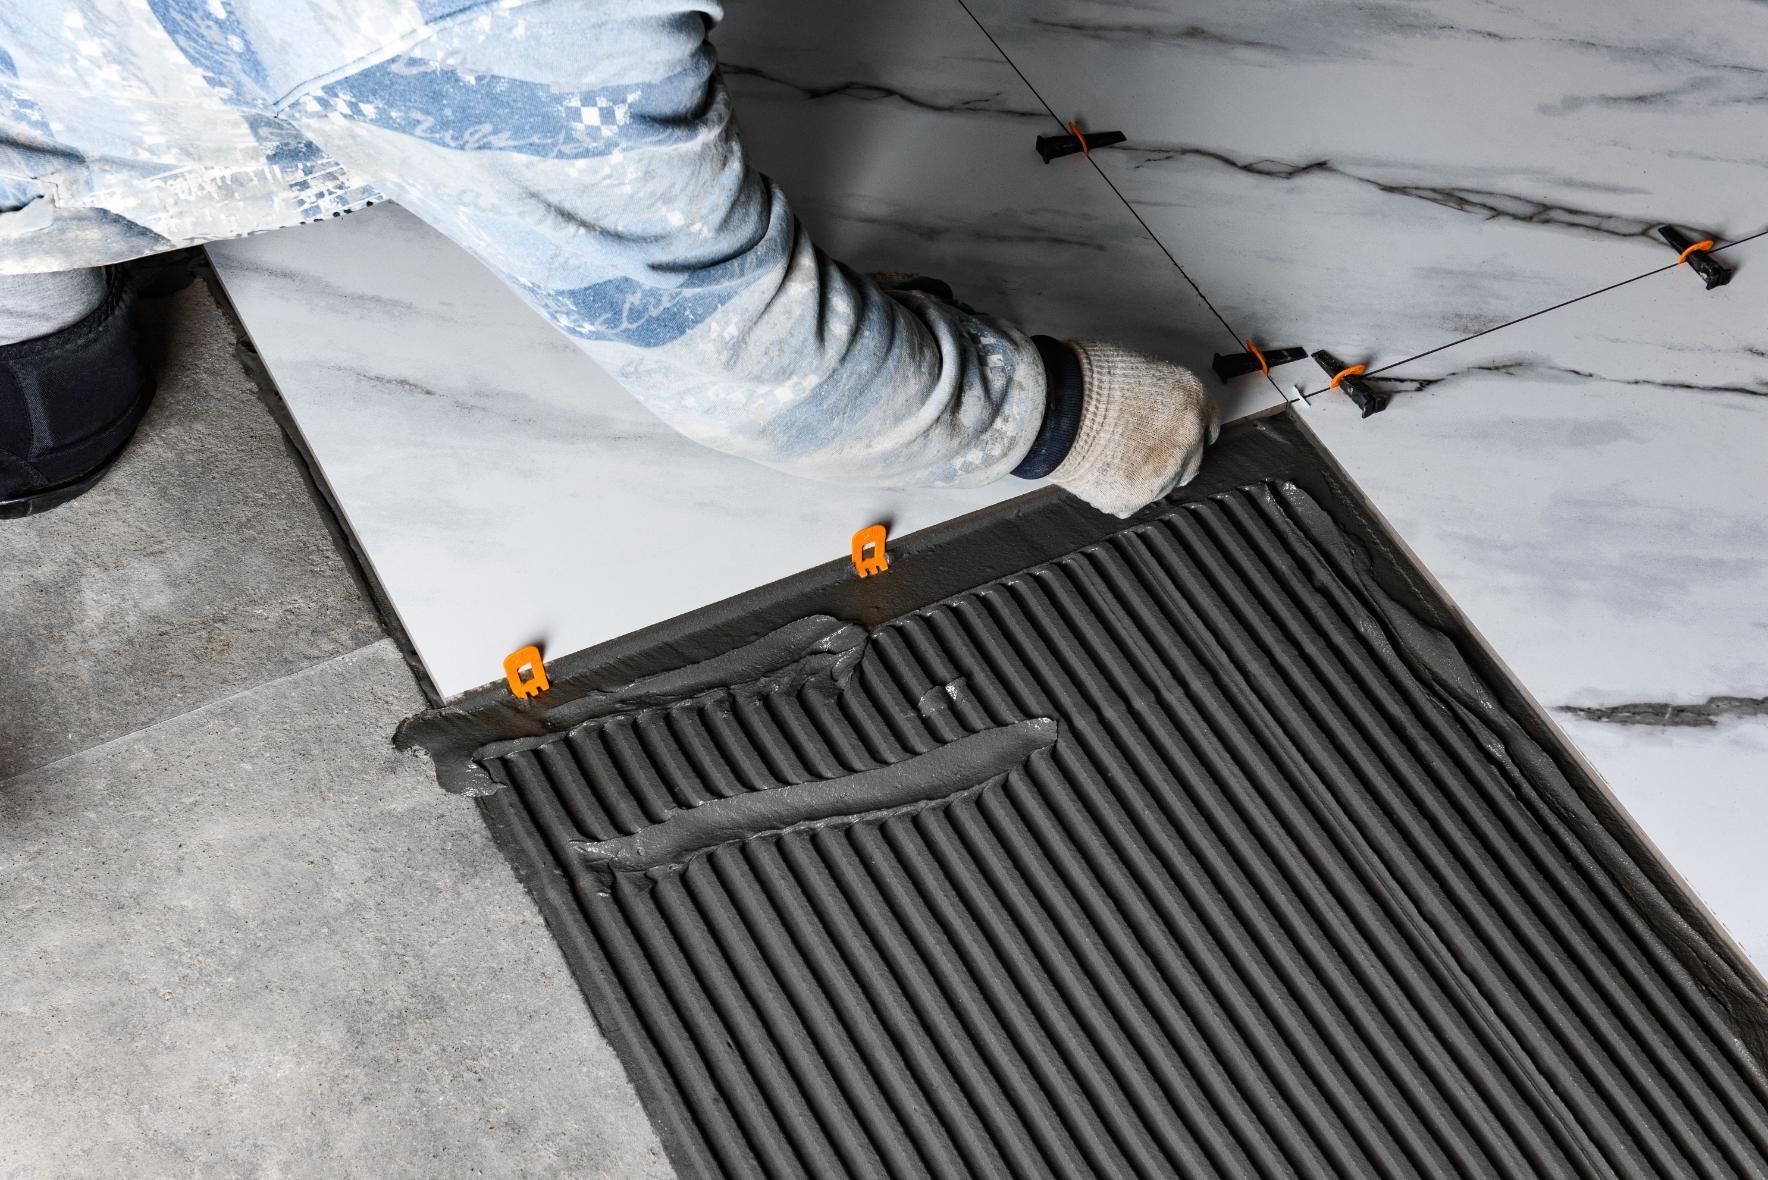
Floor Tile Installation
Ceramic floor tile installation requires careful layout planning and consistent spacing to ensure both durability and visual alignment.
Layout Planning and Dry Fitting
Tile layout is planned before installation begins to determine spacing, alignment, and cutting requirements. Dry fitting may be used to confirm positioning and reduce waste.
Mortar Application and Placement
Tile is set using appropriate mortar applied evenly across the surface. Each tile is placed with consistent spacing to maintain alignment throughout the floor.
Grouting and Joint Filling
Once the tile is set, grout is applied between joints to secure the installation and prevent moisture penetration. Proper curing time is observed to ensure strength.
Wall tile installation requires additional attention to adhesion and alignment due to vertical placement and gravity considerations.
Wall Tile Installation
Wall Surface Preparation
Walls are inspected and prepared to ensure they can support tile weight. This may include reinforcement or smoothing of uneven areas.
Tile Alignment and Installation
Tiles are installed with precise alignment to maintain consistent patterns and spacing. Proper support is used during installation to prevent slipping.
Edge and Corner Finishing
Edges and corners are carefully finished to create clean transitions between tiled and non-tiled surfaces. Trim pieces may be used where necessary.
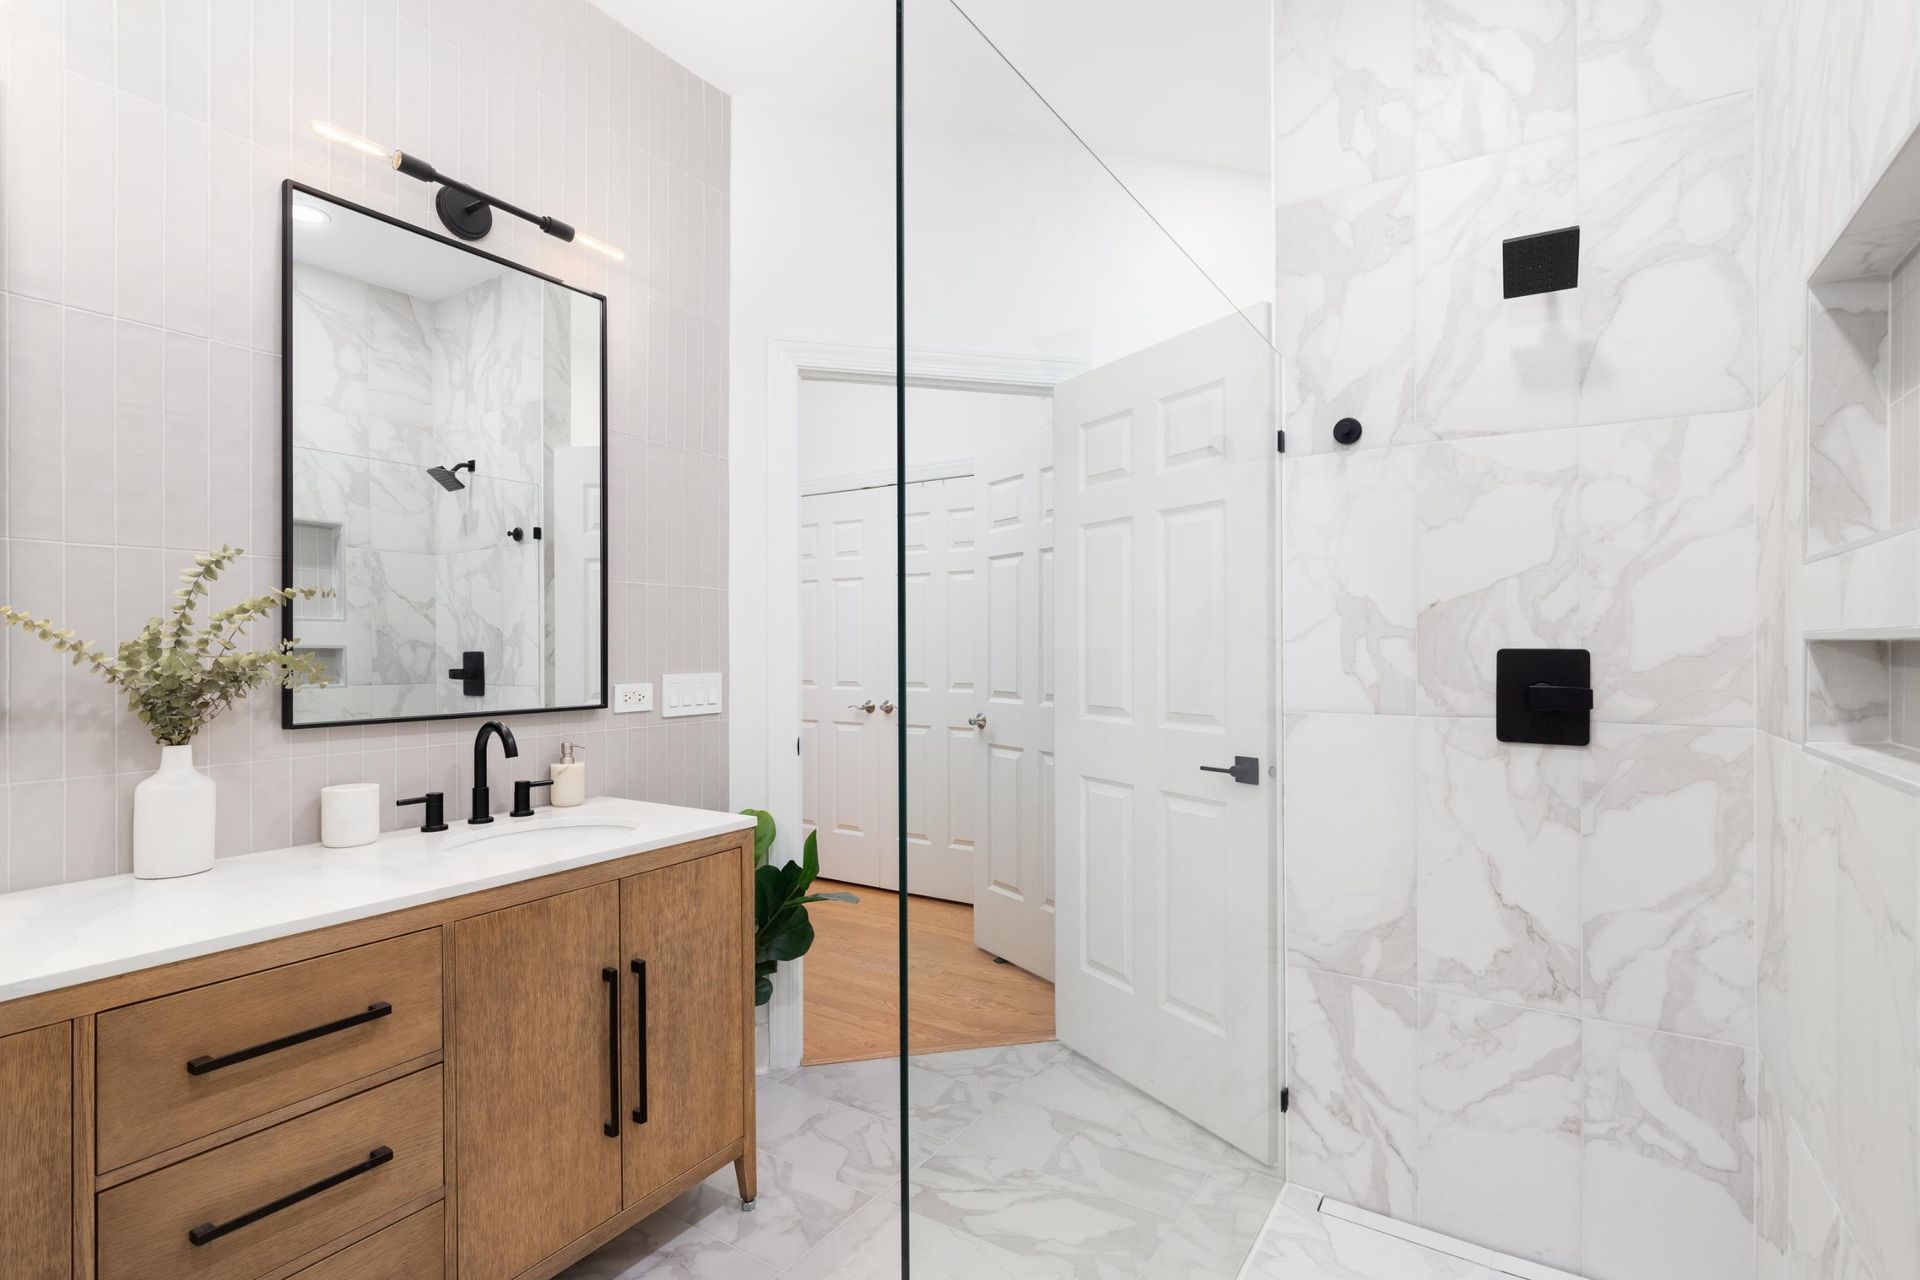
Ceramic Tile for Bathrooms and Wet Areas
Ceramic tile is commonly used in bathrooms and other moisture-prone areas due to its water resistance and durability. Installation in these spaces requires additional protective measures.
Shower and Tub Surrounds
Tile is installed around showers and bathtubs with proper waterproofing layers beneath the surface. This helps prevent moisture intrusion into wall structures.
Waterproof Backing Systems
Water-resistant membranes or backer boards are installed before tile placement. These systems provide added protection in high-moisture environments.
Sealing and Moisture Protection
Grout lines and edges are sealed to reduce water absorption and protect underlying materials. This helps maintain long-term structural integrity.
Ceramic tile is frequently used in kitchens for backsplashes and accent areas due to its ease of cleaning and resistance to heat and stains.
Kitchen and Backsplash Tile Installation
Backsplash Layout and Design
Tile layout is planned to align with countertops, cabinets, and fixtures. This ensures a clean and cohesive appearance.
Precision Installation Around Fixtures
Tiles are cut and fitted around outlets, switches, and appliances. Accurate cutting ensures a seamless integration with surrounding elements.
Heat and Stain Resistance Application
Ceramic tile is installed in areas exposed to heat and cooking activity, providing a durable surface that is easy to maintain.
Finishing and Long-Term Tile Care
The final stage of ceramic tile installation focuses on sealing, cleaning, and ensuring the surface is ready for long-term use.
Surface Cleaning and Residue Removal
After installation, excess grout and adhesive residue are cleaned from tile surfaces. This ensures a clean and polished finish.
Sealing of Grout Lines
Grout lines are sealed where necessary to improve resistance to moisture and staining. This helps extend the life of the installation.
Final Inspection and Alignment Check
All installed tile areas are reviewed for alignment, spacing, and surface consistency. Adjustments are made if needed before project completion.
Better Solution Painting provides ceramic tile installation services in Standish, ME with a focus on precise surface preparation, structured installation methods, and durable finishing techniques. Each project is completed with careful attention to detail to ensure the tile system performs reliably in both residential and moisture-prone environments.